Some time ago, Daniel Jalkut created a gist with a Jenkins job configuration to build the latest Clang (here). I decided it would be great to use this in conjunction with the Jenkins scan-build plugin to use the latest Clang to perform static analysis on all of my projects. It wasn’t completely straightforward (to me) and there are still some kinks, but here’s how I did it.
First, you’ll need to make sure a handful of Jenkins plugins are installed: Clang Scan-Build Plugin, Environmental Injector Plugin, Hudson Post build task.
Then, you’ll need the updated Clang build configuration, found here.
The updated Jenkins job adds a post build task which sets the archived clang’s executable bit (this is required due to a bug in Jenkins). It also creates a file in the Jenkins Home folder. This file is a Java properties file with a single property, STABLE_CLANG_PATH, which points to the just archived clang executable.
You’ll need to let Jenkins know where scan-build is. You’ll do this in Manage Jenkins -> Configure System. Find Clang Static Analyzer and, if needed, click Add Clang Static Analyzer. Unfortunately Jenkins environmental variables cannot be used here, so you will need to provide the full path into the Clang job. For me, this is
/Users/molloy/.jenkins/jobs/Clang/workspace/llvm/tools/clang/tools/scan-build

With Jenkin’s Clang Scan-Build Plugin, you could add static analysis to your normal build jobs. I decided not to do that, instead creating new jobs that get executed after Clang is built. This way even inactive projects get analyzed with the latest clang. You could start with a fresh job, but I made copies of the jobs I wanted to analyze then modified them for the static analyzer. You’ll want to remove the Xcode Build and any post build actions from the analysis jobs.
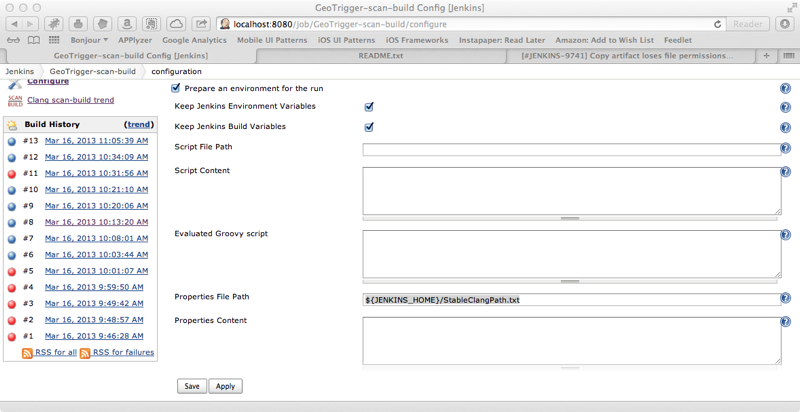
You will need to inject the contents of StableClangPath.txt into your build environment. If you are not already injecting anything into the build environment, this is pretty trivial. Check the “Prepare an environment for the run” in the Project’s settings. Set Properties File Path to
${JENKINS_HOME}/StableClangPath.txt.
If you are already injecting properties into your build environment, you’ll need to merge your properties with the contents of StableClangPath.txt. I leave this as an exercise for the reader.
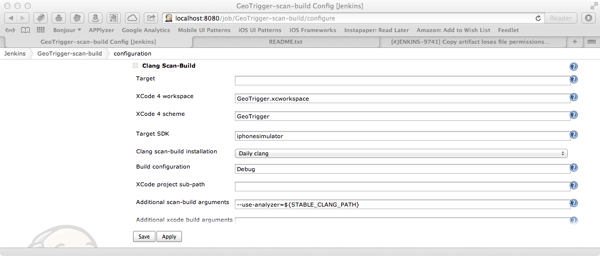
Now, you’ll need to add a Clang Scan-Build build step and Public Clang Scan-Build Results post-build action. You’ll have to setup your target, workspace, and scheme depending on your project. Also, you’ll need to let scan-build know where to find the clang executable. Click the Advanced button to expose some more settings. Most of this should be configured properly already, but the Additional scan-build arguments setting should be set to
--use-analyzer=${STABLE_CLANG_PATH}
For my iOS projects, I had to set Build Active Architectures Only to NO for iOS Simulator or scan-build would complain about not being able to build the proper architecture. There is probably a better fix, but this works well enough for me.
Also, the Jenkins Clang Scan-Build Plugin does not currently know how to handle the directory layout of the current version of scan-build (See: JENKINS-17092). You will still get a report of the number of issues found and a brief summary of each one, but the links Jenkins provides for details about each issue are incorrect. Hopefully this issue is resolved soon, but in the meantime you can find the report in your filesystem and view it manually. The path to the report is listed at the end of the build console log, look for
scan-build: Run 'scan-view ...
to find the path.
That’s it, Jenkins is now set up to run scan-build using the latest clang on your project!